
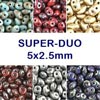
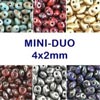
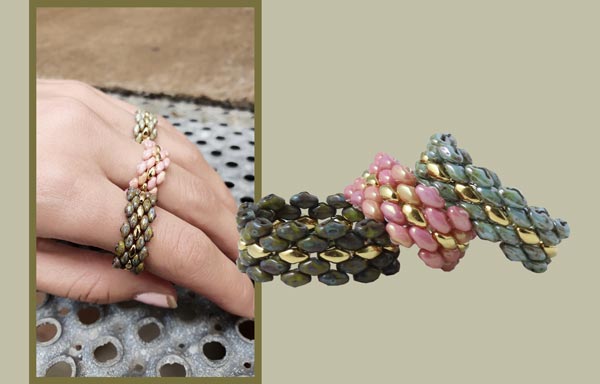
Super-duo beads and Mini-duo beads are quality glass beads by the Japanese company Matubo. The beads are very uniform in size and shape and feature a soft oval shape and two parallel holes.
This special shape and the two holes allow you to create exciting and unique designs for nearly every kind of jewellery.
Matubo Super-duo is the larger of the two sizes and mostly used for bracelets and other larger pieces of jewellery. Mini-duo beads feature the same characteristics as Super-duo beads, but they are smaller in size and more suitable for earrings and more delicate pieces of jewellery. These beads, which are relatively unknown here in Danmark, really have potential. They let you come up with new and fascinating jewellery designs which are just waiting for to be carried out.
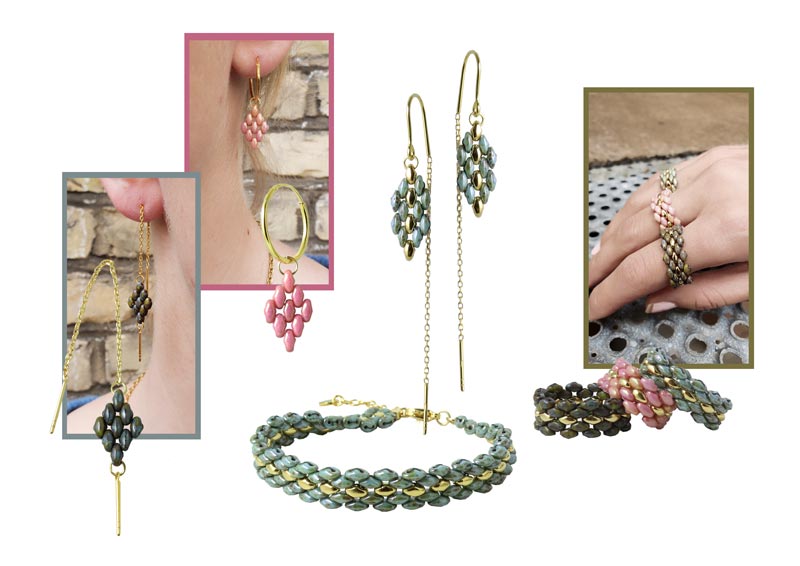
Bracelet with Mini-Duo Beads
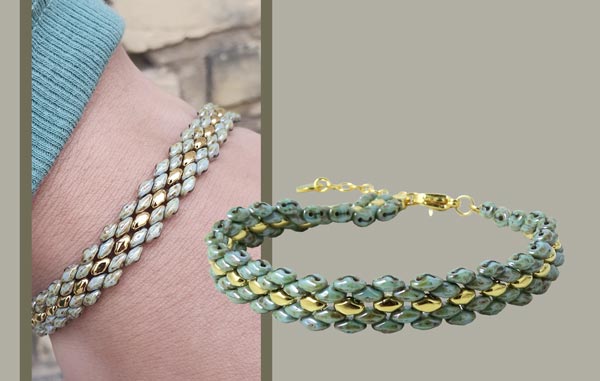
We used the following DIY components to make this bracelet:
- Mini-duo beads, chalk blue/brown marbled
- Mini-duo beads, 24-carat gold-plated
- approx. 2m FireLine, 6LB, black
- 2 jumprings, 4x0.5mm, gold-plated steel
- 2 jumprings, 0.4mm, gilded sterling silver
- 1 lobster claw clasp, 9mm, gilded sterling silver
- 1 chain extender, gilded sterling silver
+ 2 beading needles
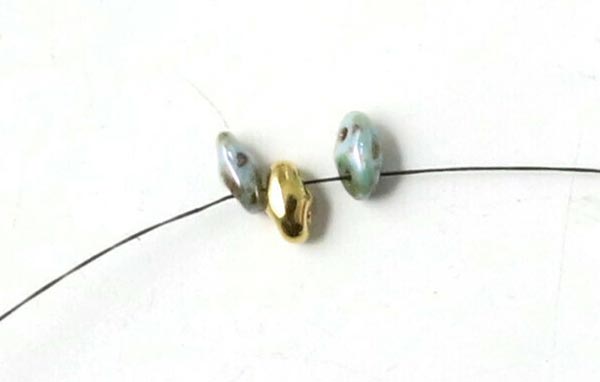
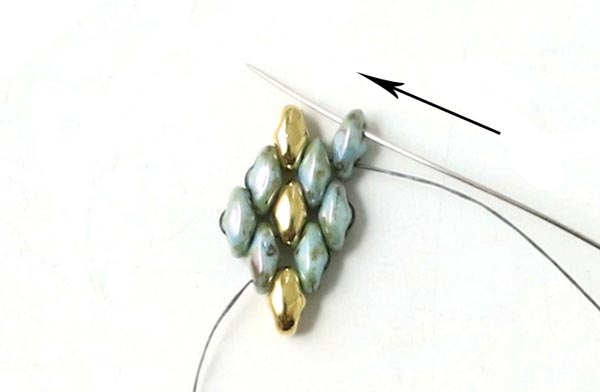
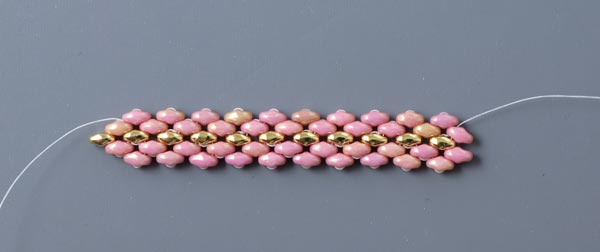
First, you thread a beading needle on either end of the FireLine thread (1 needle on each end of thread). Then you string 3 beads (green - golden - green).

Sew back through the other hole in the bead on the right.
Thread a golden bead ... and continue through the first bead.
Tighten the thread.
Picture 1
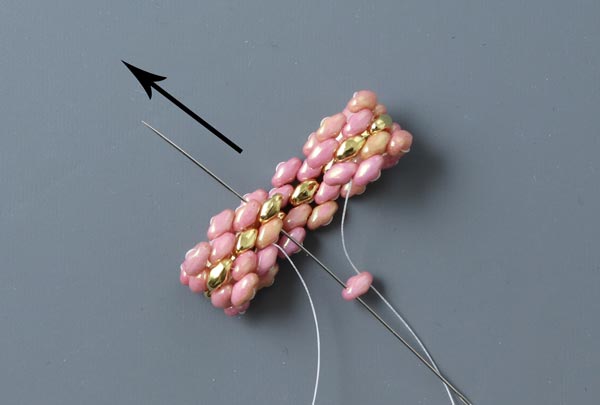
Turn your work. From now on, you sew with 1 needle only. Position your work on the thread leaving a thread end of approx. 10cm length.
String a new green bead.
Picture 2
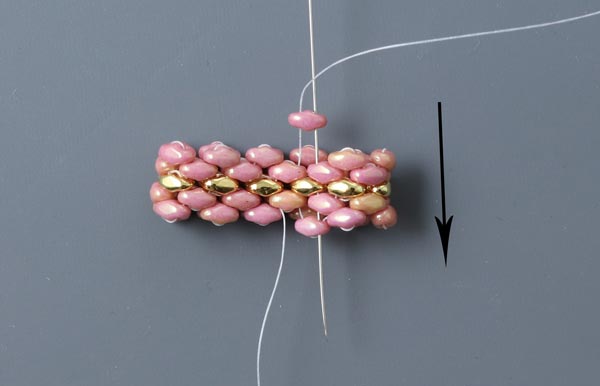
Sew back through the bead ... through the upper hole.
Picture 3
Thread a new green bead and sew through the golden bead.
Picture 4
Tighten the thread.
Picture 5
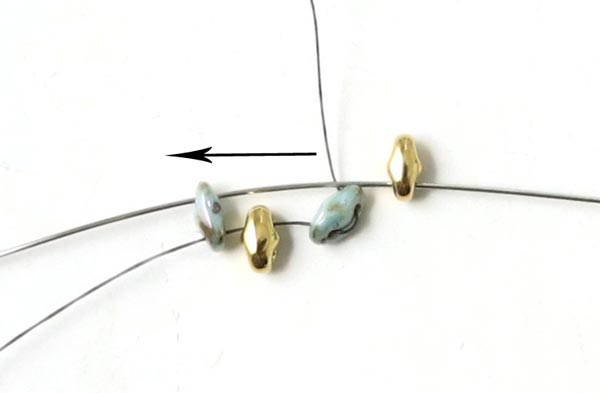
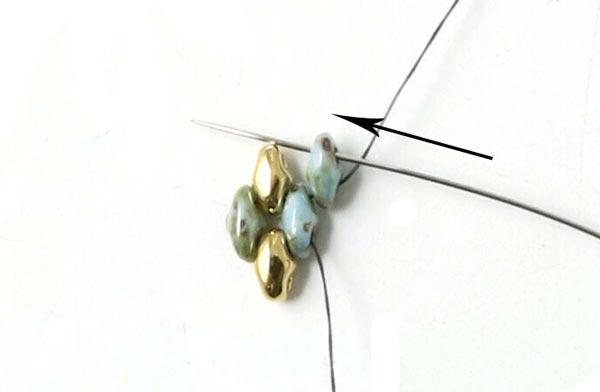
String 2 green beads ... and sew back through the last green bead.
Picture 6
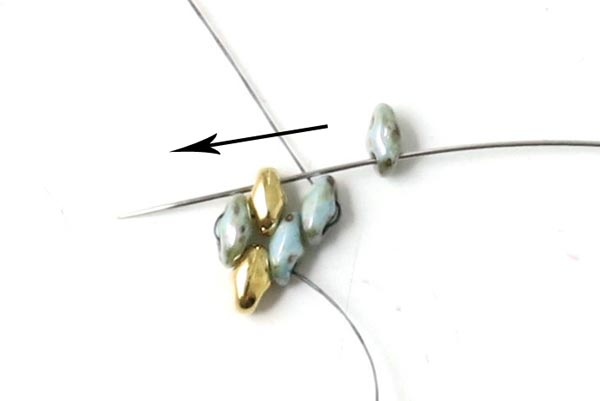
.... continue through 2 beads (see picture)...

Picture 7
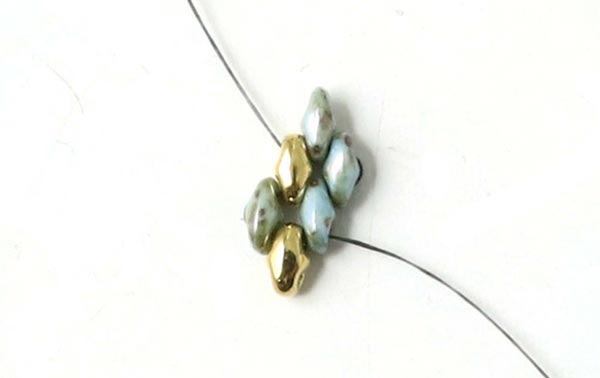
... and through 1 bead more (as shown in the picture).
Picture 8
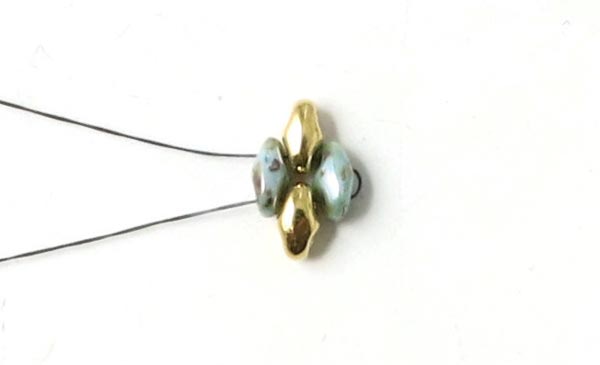
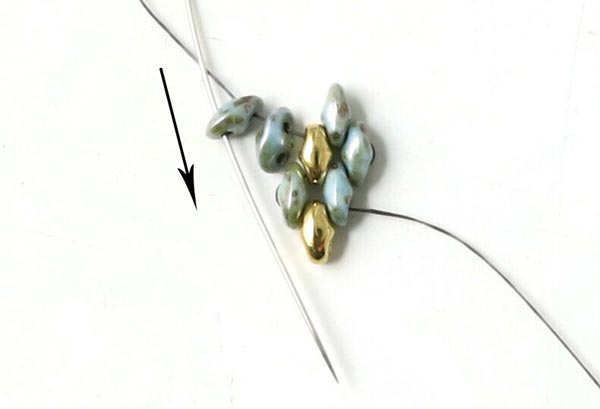
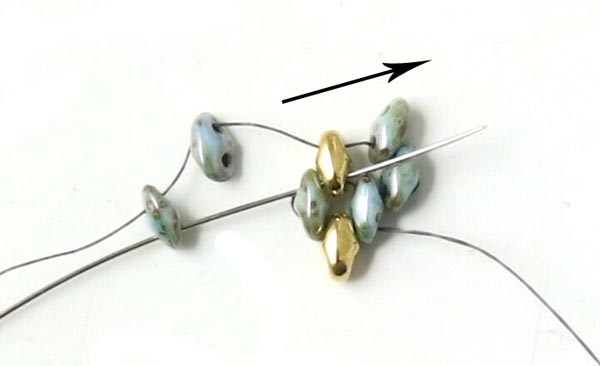
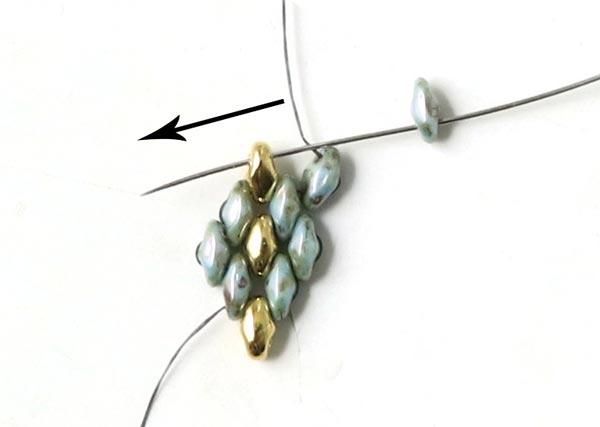
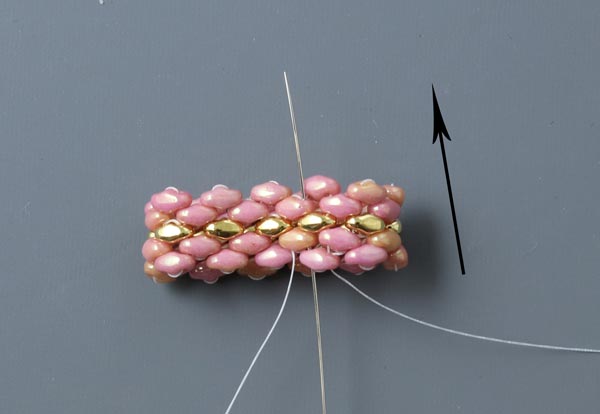
Now you sew back through the bead the thread is coming out of ... string a golden bead ... and continue through the last green bead.
Picture 9
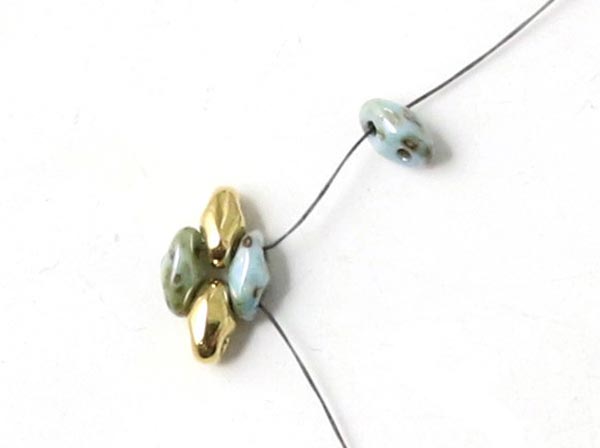
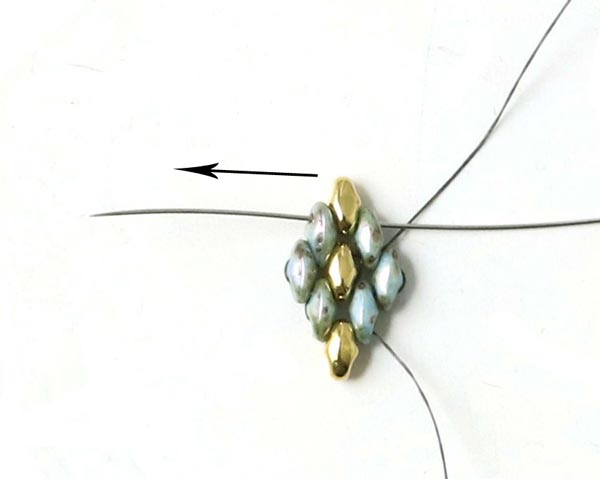
Turn your work.
Now you start from the beginning ... from Picture 1: String a new green bead ... and sew back through the same bead ...
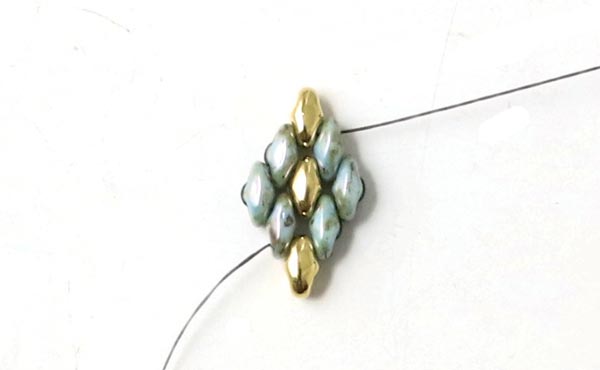
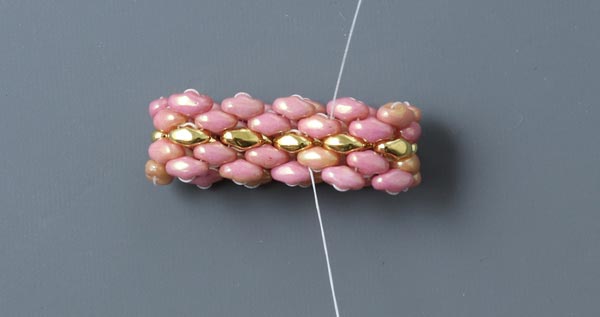
Repeat the proces from Picture 1 to 9 inclusively ... until the bracelet has reached the desired length.
Fasten the thread ends by sewing through some random beads.
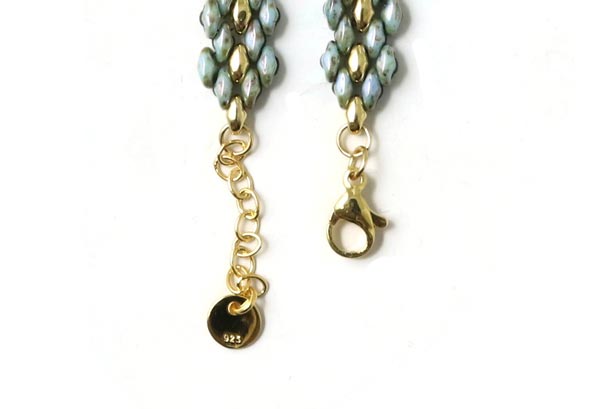
After that, you pull a jumpring through the last golden bead at one end and fasten the lobster claw clasp to it. Finally, you pull a jumpring through the last golden bead at the other end and attatch a chain extender to this one.
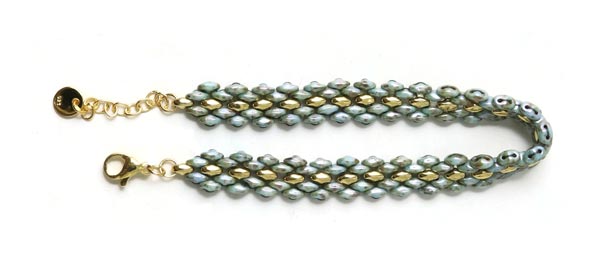
Your bracelet is finished.
Earthreads with Mini-Duo Beads
We used the following DIY components to make these earrings
- Mini-duo beads, chalk blue/brown marbled
- Mini-duo beads, 24-carat gold-plated
- 1 pair of earwires with chain, loop and peg, gold-plated sterling silver
- 2 jumprings, 4x0.5mm, gold-plated steel
- approx. 2 x 30cm FireLine, 6LB, black
+ 2 beading needles
These earrings are sewn in the same way as the bracelet. When there are 4 golden beads in the centre, you fasten the thread ends.
Then you pull a 0.4mm jumpring through the golden bead on top ... and connect it to the earthread.
Rings with Mini-Duo Beads
We used the following DIY materials to make these rings:
- Mini-duo beads, marbled olive picasso
- Mini-duo beads, pink AB
- Mini-duo beads, chalk blue/brown marbled
- Mini-duo beads, 24-carat gold-plated
- approx. 80cm FireLine, 6LB, white + FireLine, 6LB, black
+ 2 beading needles
The rings are sewn in the same way as the bracelet. Continue until the ring has got the right length. You stop when there are 2 beads sticking out because the two ends have to be joined together.
Thread 1 bead ... sew back through the other hole of the bead ... and continue through the first 3 beads.
Thread 1 more bead ... sew back through the bead ... and continue through 4 beads.
To close the ring completely, you sew through 4 beads more (see picture).
Tighten the thread ... and fasten both thread ends by sewing through some random beads.
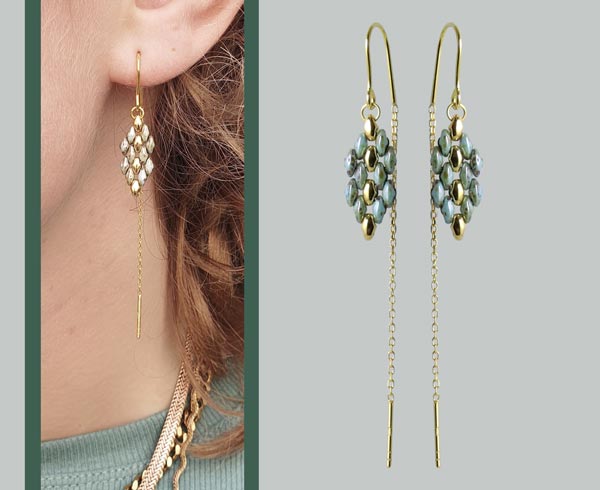
Earrings with Mini-Duo Rhombs
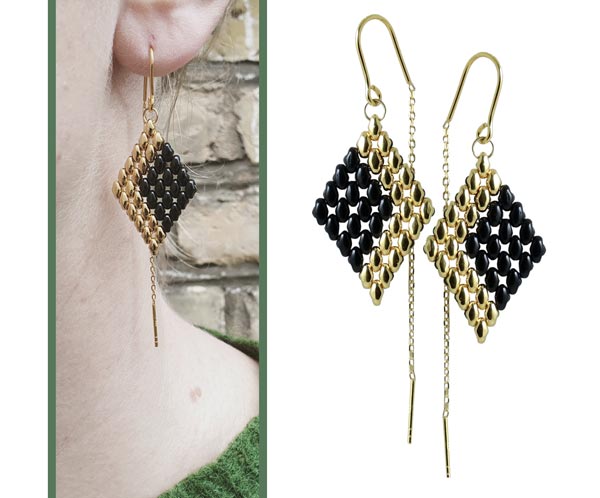
The following examples feature rhombic pendants made of Duo-beads.
You find the step-by-step instructions on how to sew these rhombes in our earlier blog post on Duo Bead Jewellery.
Hoops with Mini-Duo Beads
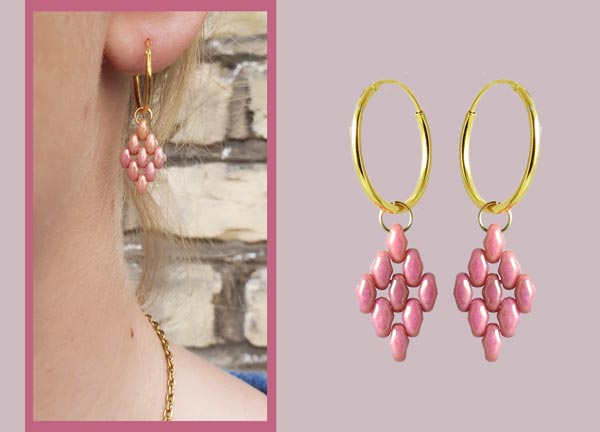
We used the following DIY materials to make thiese earrings:
- Mini-duo beads, pink AB
- 2 jumprings, 4x0.5mm, gold-plated steel
- 1 pair of hinged hoops, 16mm, gilded sterling silver
- approx. 2 x 30cm FireLine, 6LB, white
+ 2 beading needles
Fremgangsmåde er beskrevet i tidligere blogindlæg.
Once you have finished the rhomb, you pull a jumpring through the top bead. Now you can use it as pendant for the hoop.
Earthreads with Mini-Duo Beads

We used the following DIY components to make these earrings:
- Mini-duo beads, marbled olive picasso
- 1 pair of earthreads, cable chain, with pegs, 8cm, gold-plated silver
- 4 jumprings, 4x0.5mm, gold-plated steel
- approx. 2 x 30cm FireLine, 6LB, black
+ 2 beading needles
Fremgangsmåde er beskrevet i tidligere blogindlæg.
Cut the earthread right above one of the pegs. Pull one jumpring through the bottom bead of the pendant and through the junpring over the peg. Then you pull a jumpring through the top bead of the pendant and through the last link of the cable chain.
We will publicly show your name and comment on this website. Your email is to ensure that the author of this post can get back to you. We promise to keep your data safe and secure.