In this blog post, we take a look at the many options silver wire can offer you if you want to make your own beautiful and unique jewellery pendants and links. You can work with beads and wires in different sizes and colours to create your own customised variations and patterns. Use the pendants for earrings and bracelets or experiment with larger versions made of thicker wire and with larger beads for necklaces or the like. If you are a beginner in the field of jewellery making, you might consider using cheaper metal wire until you have mastered the technique.
Please note that you need the basic jewellery tools to assemble the examples shown in the pictures. If you do not own them yet, you can find them here:
+ round-nose pliers + chain-nose pliers + flat-nose pliers + flush-cutter pliers
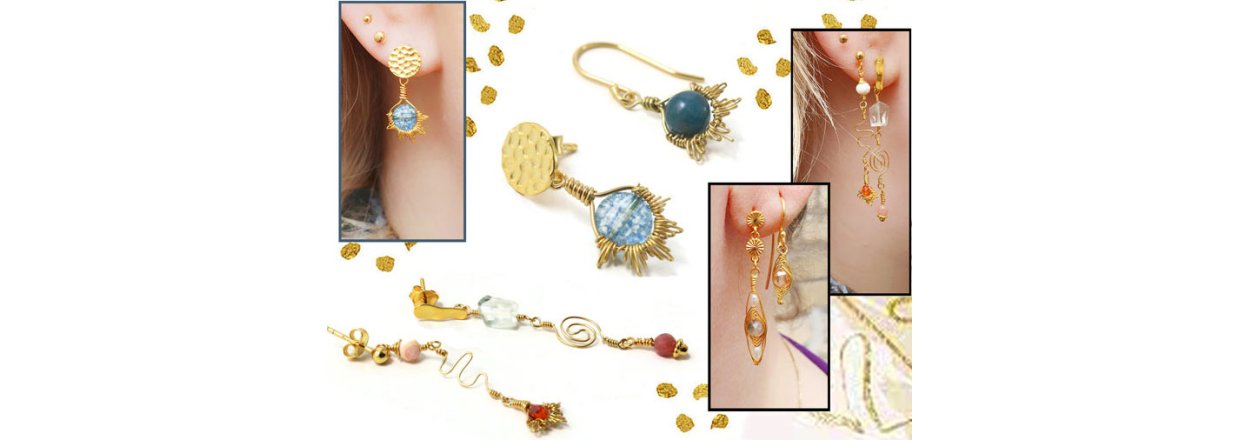
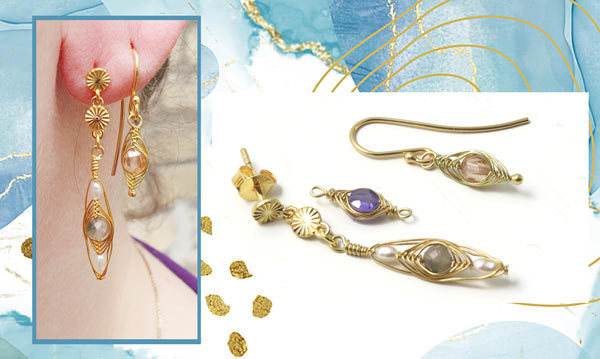
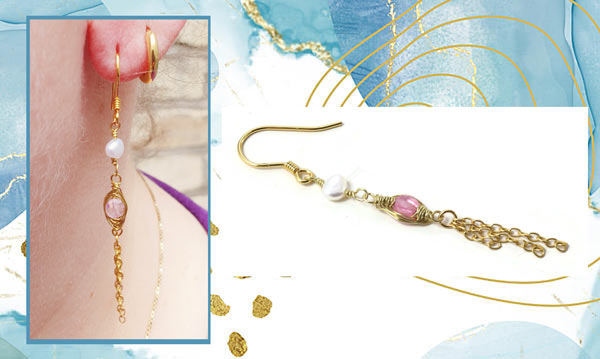
Herringbone Wire Wrap Pendant
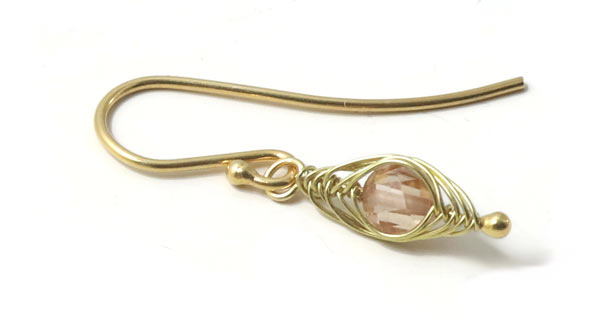
We used the following DIY components to make this earring:
Headpin with ball, gilded sterling silver
Wire, 0.3mm, gilded sterling silver
Earwires with ball, gilded sterling silver
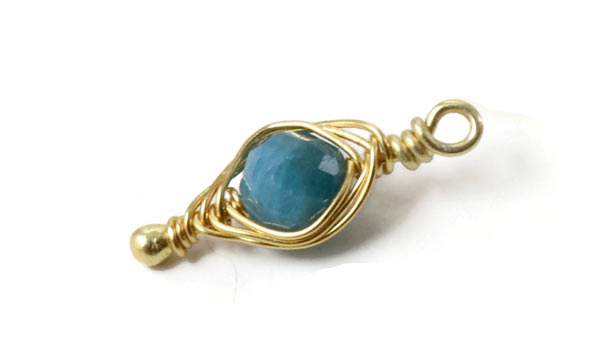
For this pendant, we used the following components:
Headpin with ball, gilded sterling silver
Wire, 0.3mm, gilded sterling silver

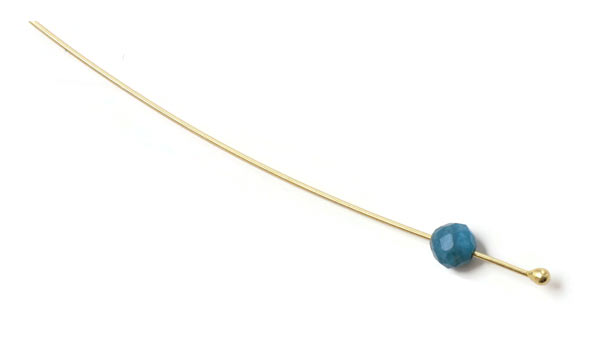
String a bead on the headpin.
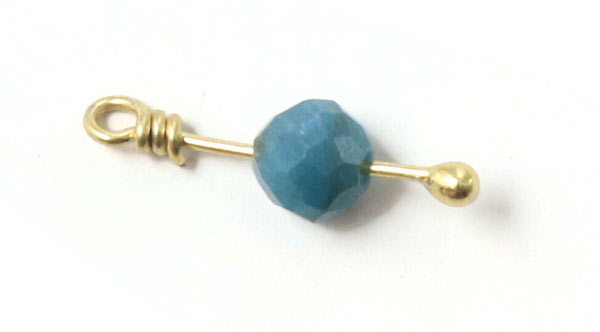
Form a loop with windings. (See our guide How to make a loop for further instructions.) Leave a gap on either side of the bead.
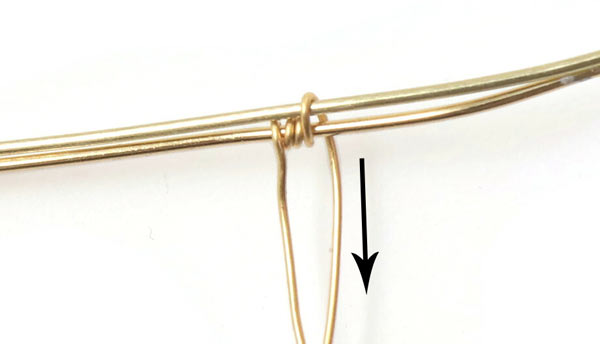
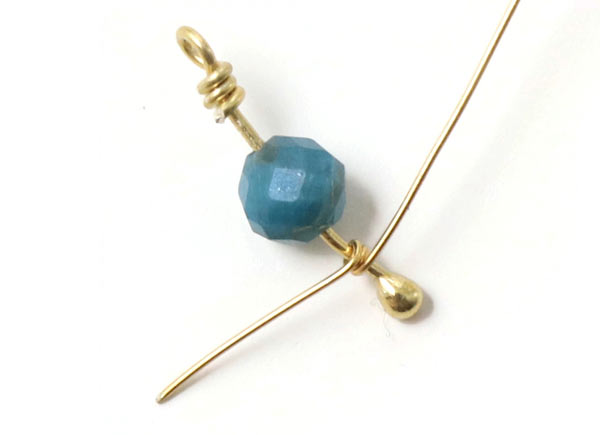 Cut approx. 15cm of 0.3mm wire to size. Then you start winding the wire around the headpin a few times.

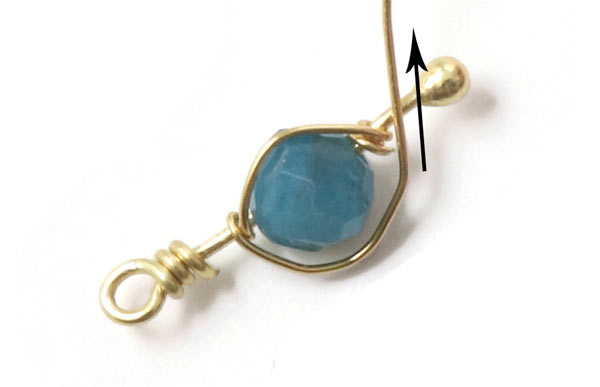
Bend the wire around the bead.
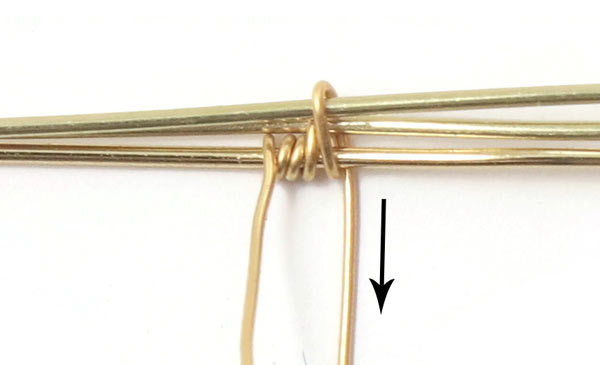
 Wind the wire around the headpin - close to the top of the bead.
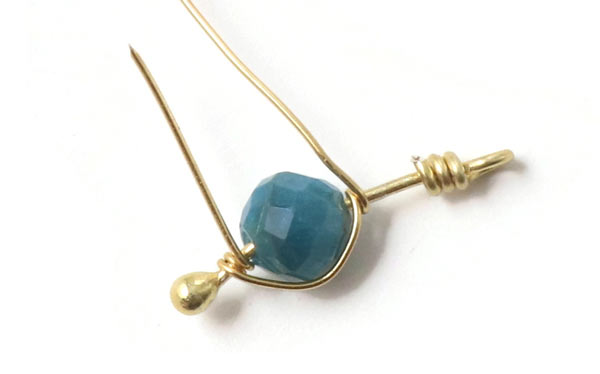
Turn your jewellery piece ... and bend the wire around the other side of the bead.
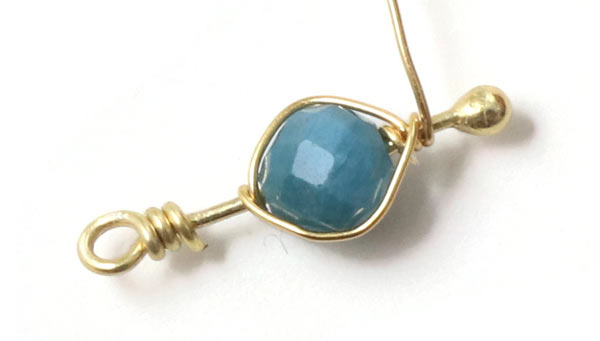
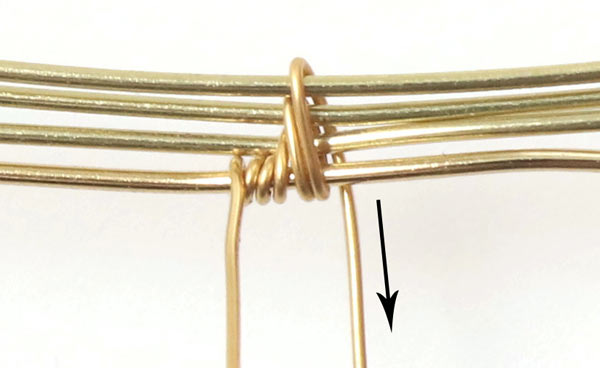
Wind the wire around the headpin once - close to the bottom of the bead.
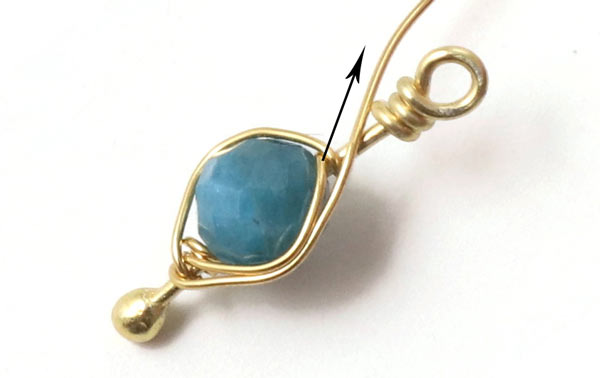
Turn your piece again ... and bend the wire upwards to the top of the bead.
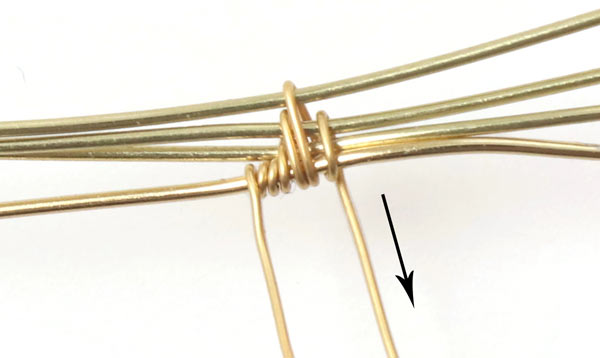
Wind the wire around the headpin - right above the first winding.
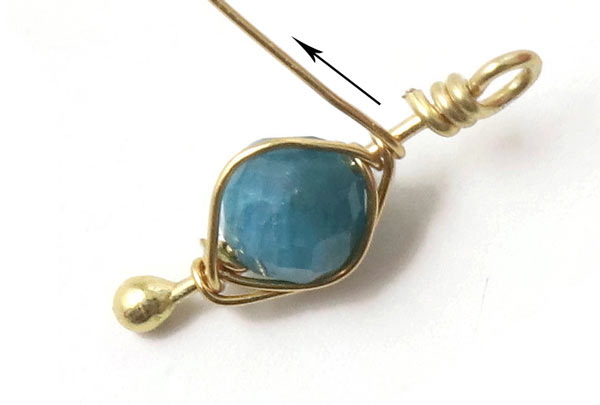
Turn your piece ... and repeat all these steps.
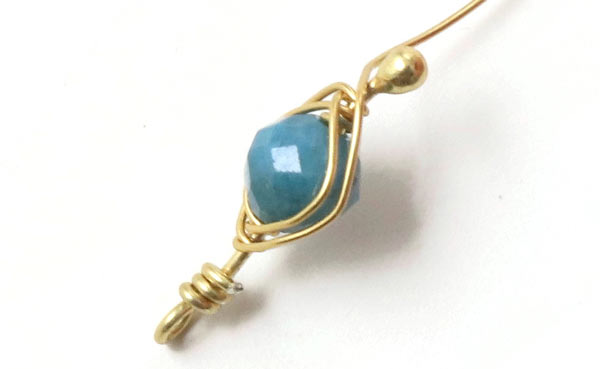
Wind the wire around the headpin alternately on top and at the bottom of the bead.
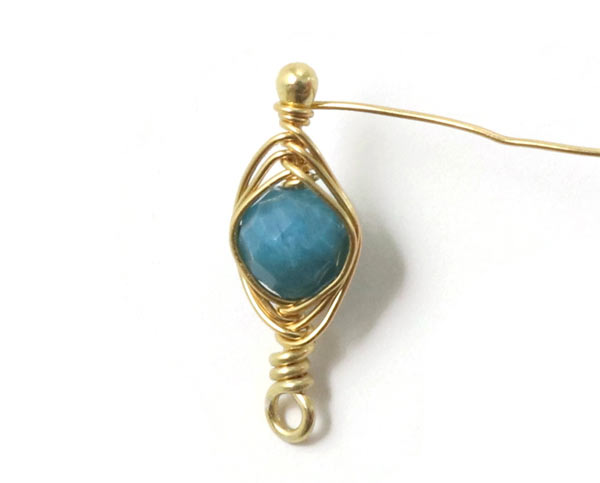
Here you see 3 windings on either side of the bead. (The number of windings depends on the size of the gap on either side.)
Finally, you wind the wire around the headpin one more time.
Cut off the excess wire. Now the pendant is done and can be used by itself or together with other jewellery components.

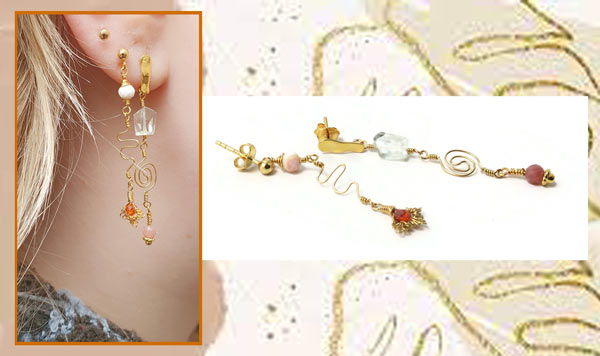
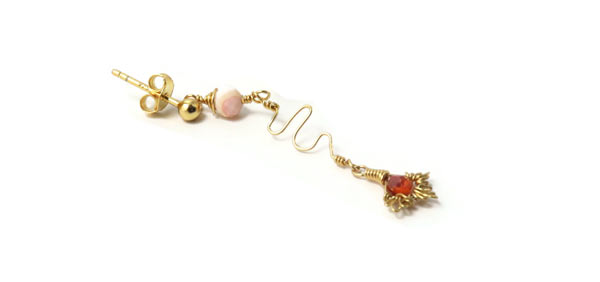
We used the following DIY components for this earring:
Headpin with plate, gilded sterling silver
Wire, 0.3mm, gilded sterling silver
Link, round, faceted, gilded sterling silver
Earstuds with faceted plate, gilded sterling silver
2 freshwater pearls, length approx. 2-4mm
Labradorite bead, 4mm, faceted
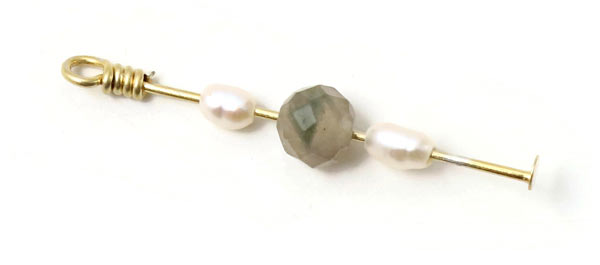
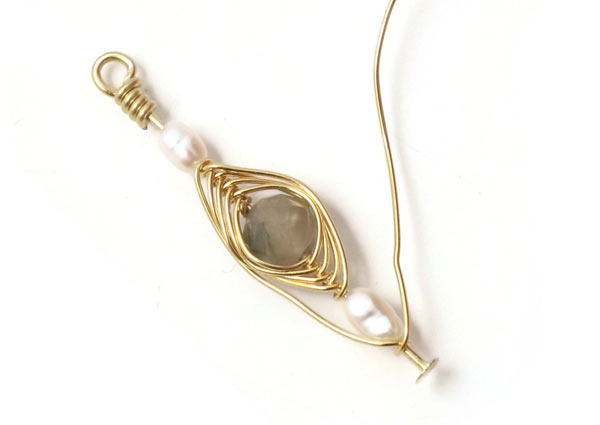
First, you string the bead and the pearls on the headpin. Then you form an loop with windings. (See our guide How to make a loop for further instructions.) Remember to leave gaps between the bead and the pearls.
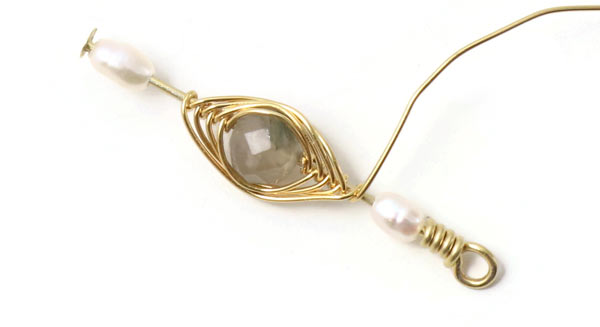
Wind the wire around the bead in the middle as described in the 1. example. In the picture above you see 3 windings on either side of the bead.
Push the freshwater pearl down the the windings ... and wind the wire around the headpin underneath the pearl in the same way.
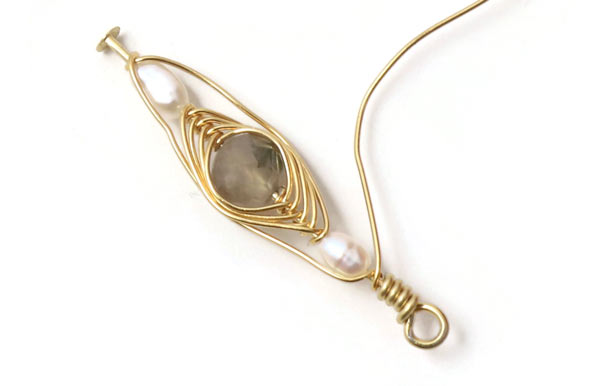
Turn your piece of jewellery. Bend the wire all the way up ... to the upper freshwater pearl ... and make a winding there.
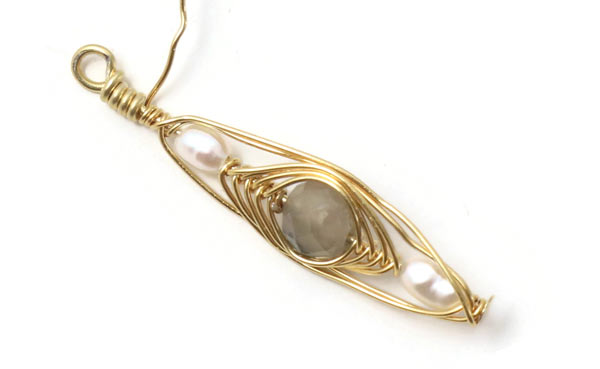
Turn you piece of jewellery ... and make so many windings as the space allows. Finally, you cut off the excess wire.
Herringbone Wire Wrap Pendant with Zirconia
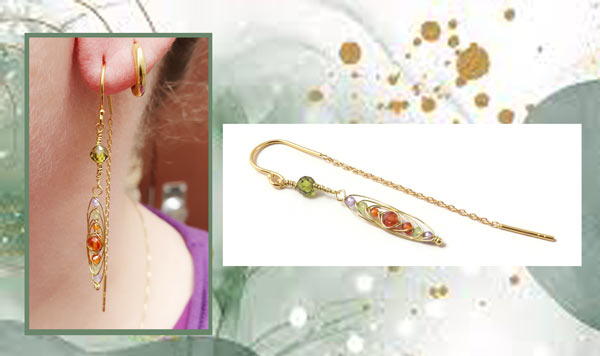
This example was made in the same way - but with more beads. We used cubic zirkonia in the sizes 4mm + 3mm + 2mm together with earwires with chain.
Herringbone Wire Wrap Link
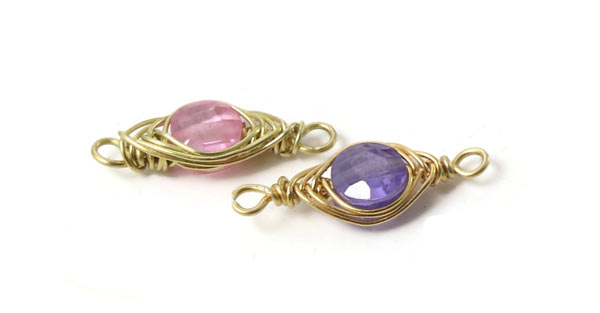
To make these links, we used the same technique as for the pendants. You string the bead on 0.4mm wire. First you form a loop ... then you string the bead ... and after that you form another loop. For the herringbone wrapping you use wire with a diameter of 0.3mm.
Wire Wrap Sun Pendant
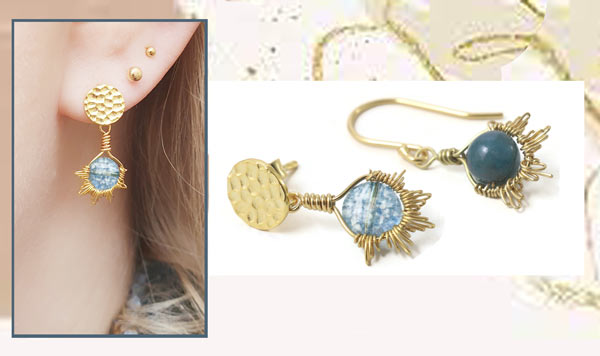
For this earring, we used the following components:
Earstuds with hammered coin, gilded sterling silver
Wire 0.5mm, gilded sterling silver
Wire, 0.3mm, gilded sterling silver
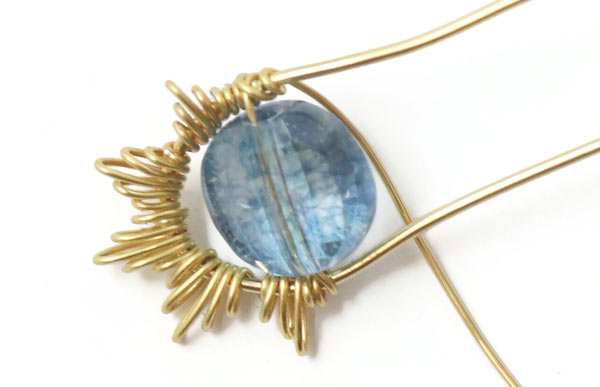
First, you cut 4 x 7cm wire with a diameter of 0.5mm to size. (3 of the 4 pieces are only used as scaffolding to form the sun beams and can be replaced by gilded copper wire with a diameter of 0.5mm.)
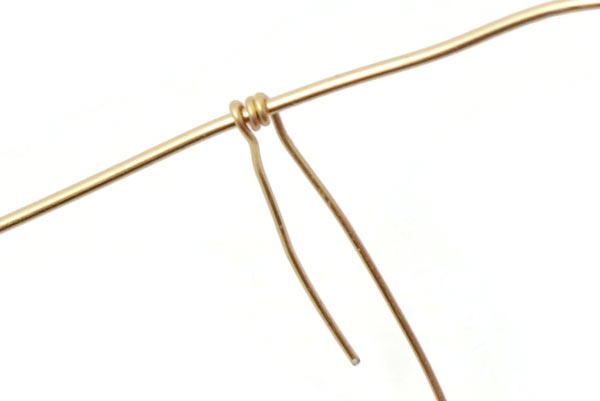
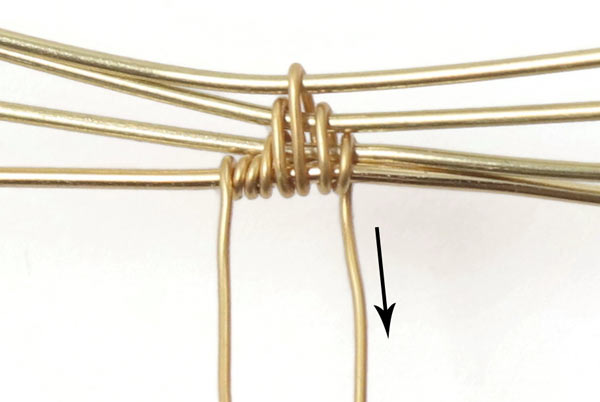
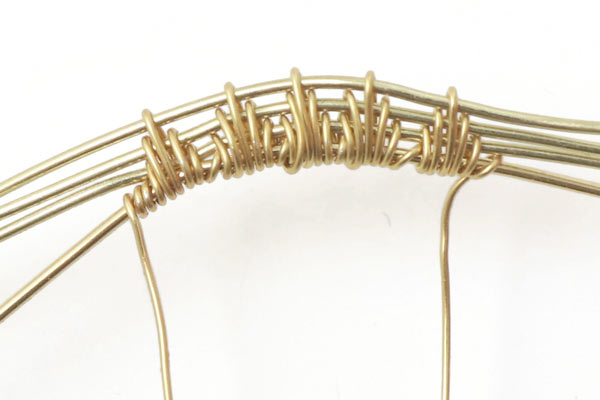
Wind 0.3mm wire around a piece of 0.5mm wire a few times.
Place a second piece of 0.5mm wire on top of the first and wind the thinner wire around the two thicker ones.
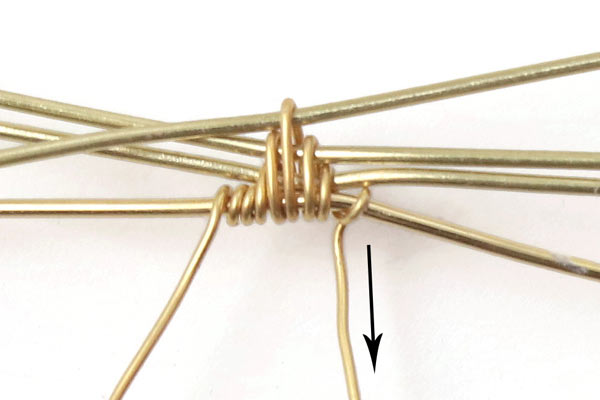
Place another piece of 0.5mm wire on top of the others and wind the 0.3mm wire around the three thicker wires. Make the windings as close to each other as possible. You can also use a pair of chain-nose pliers to press them together.
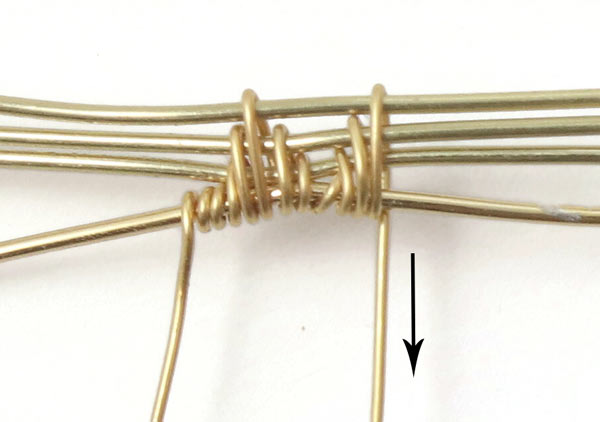
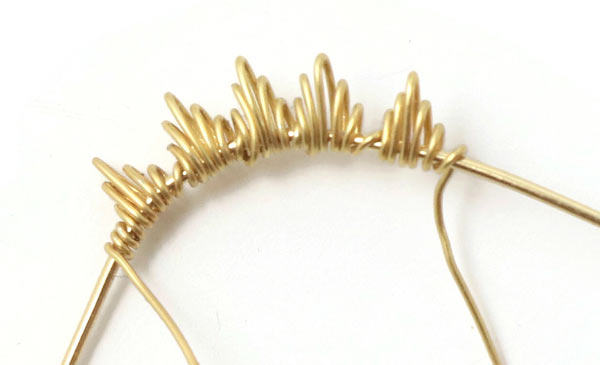
Now you place a forth piece of 0.5mm wire on top of the others and wind the thin wire around the four 0.5mm pieces. This is the tip of the first sunbeam.
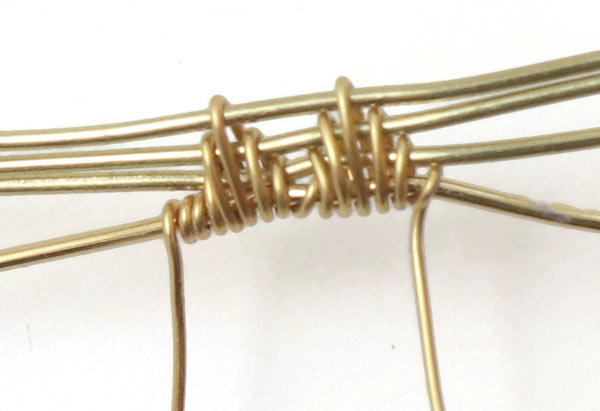
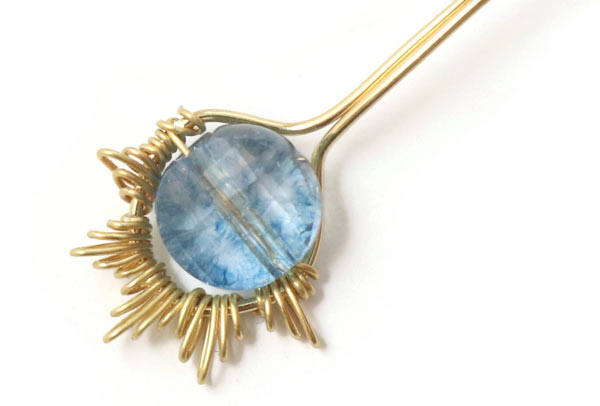
Wind the thin wire around the 3 first thicker ones...
... then around the first two thicker ones ...
... and after that only around the first thicker piece of wire. Now, the first sunbeam is done.
Make the next 4 windings in the same way as the first 4 windings...
... and continue with 4 windings top down.
Continue like this until you have 4 sunbeams.
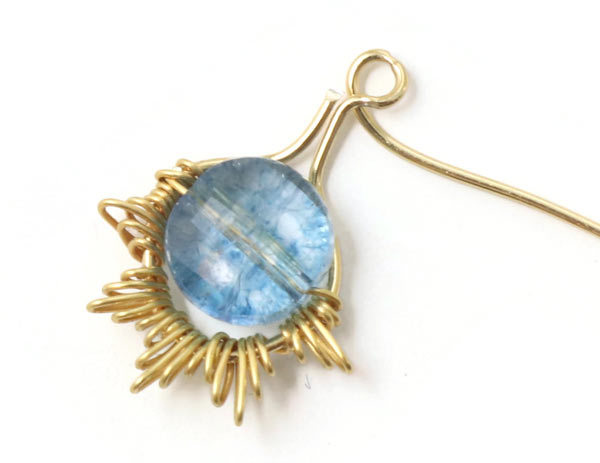
Keep the first 0.5mm wire - but pull out the three other ones.
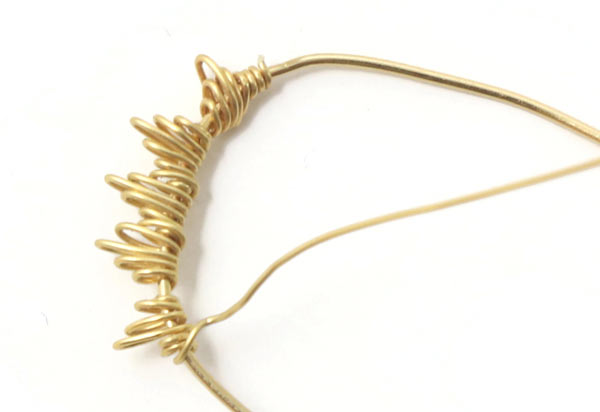
Cut off the excess wire at the starting point, so you still have enough thread to fasten a bead in the sun pendant.
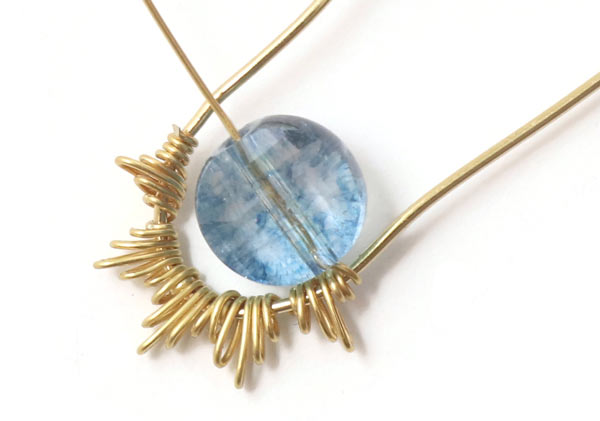
String a bead on the thinner wire and bend the two thicker wire ends towards each other.
Make a few windings in order to secure the bead.
Cut off the excess 0.3mm wire ... and bend the 0.5mm wire ends so they sit tightly around the bead.

Form a loop with one of the wire ends ...
... and cut off the other end directly under the loop.
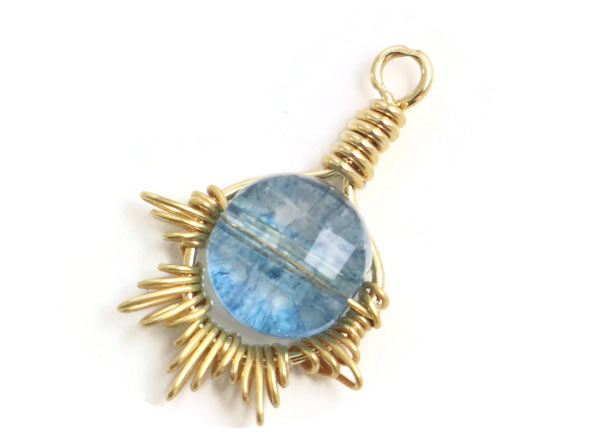
Make windings around both pieces of wire ... and cut off the excess wire. 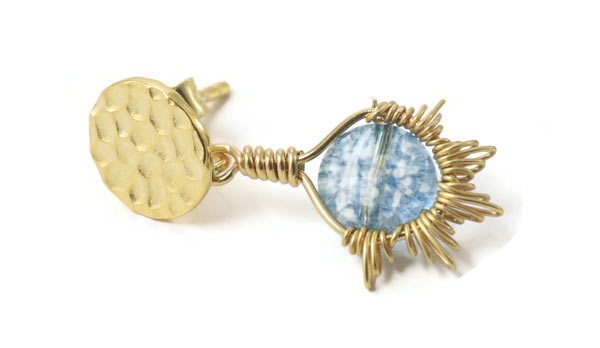
Finally, you open the eyelet of the earstud carefully, insert the loop of the pendant ... and close the eyelet again.
Wire Wrap Spiral Link

For this earring, we used the following components:
Earstuds, wavy, elongated, gilded sterling silver
Wire, 0.4mm, gilded sterling silver
Headpin with wreath, gilded sterling silver
Green amethyst, uneven faceted
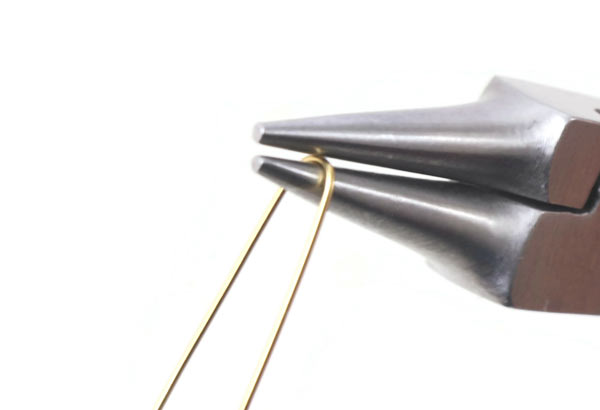
Cut off approx. 8cm of wire ... and use a pair of round-nose pliers to bend the wire in the middle.
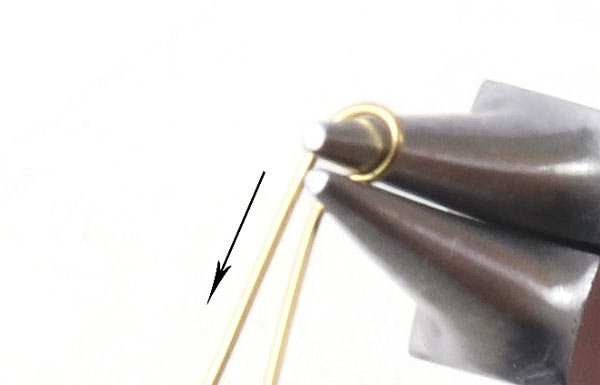
Take hold of the wire on the right ... and bend it back over the upper jaw of the pliers.
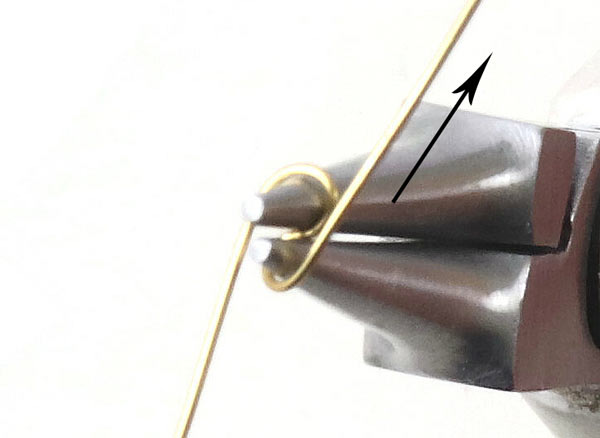
Take hold of the wire on the right and bend it upwards.
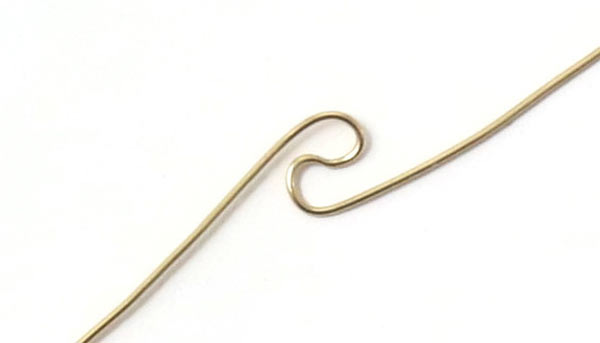
Now, the wire is shaped like this.
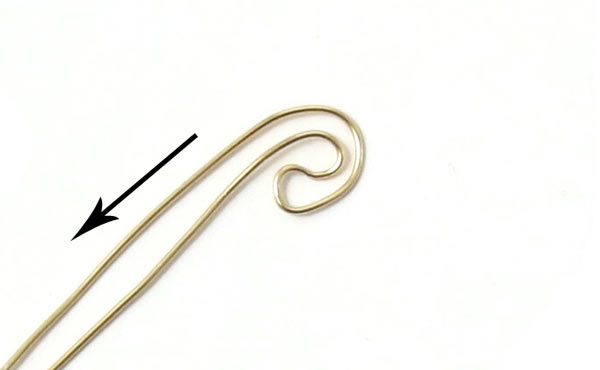
Take hold of the wire end on the right and bend it carefully around so it follows the curve in the middle of the spiral.
Take hold of the wire end on the right and bend it around, following the curve.

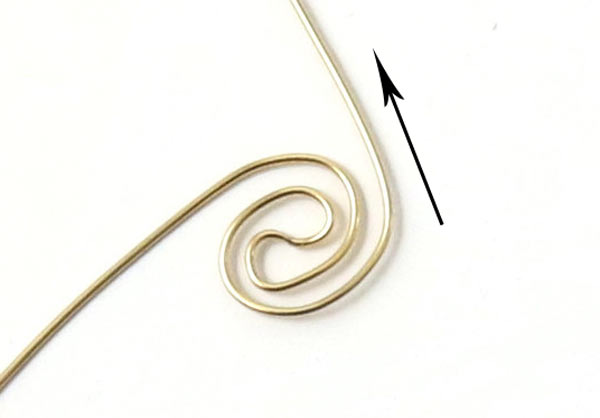
Take hold of the wire end on the left and bend it carefully, following the curve of the spiral.
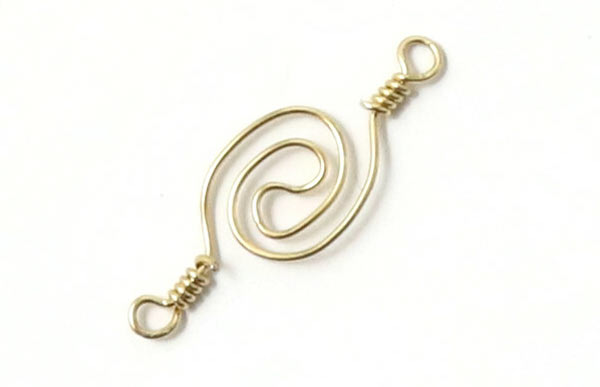
Finally, you finish off the spiral by forming a loop with windings on either side. Now the link is done and can be used as decoration for various kinds of jewellery.
For this example, we assembled a little sun pendant. The curved link is made out of 0.4mm silver wire which was shaped with the help of a pair of round-nose pliers. We finished the link on either side with a loop and windings.
Have fun :-)
We will publicly show your name and comment on this website. Your email is to ensure that the author of this post can get back to you. We promise to keep your data safe and secure.